Sticker Master
Yamaha XJR1300 Sticker Side Fairing Lettering | Sticker Master
Yamaha XJR1300 Sticker Side Fairing Lettering | Sticker Master
Couldn't load pickup availability
Product Description
Product Description
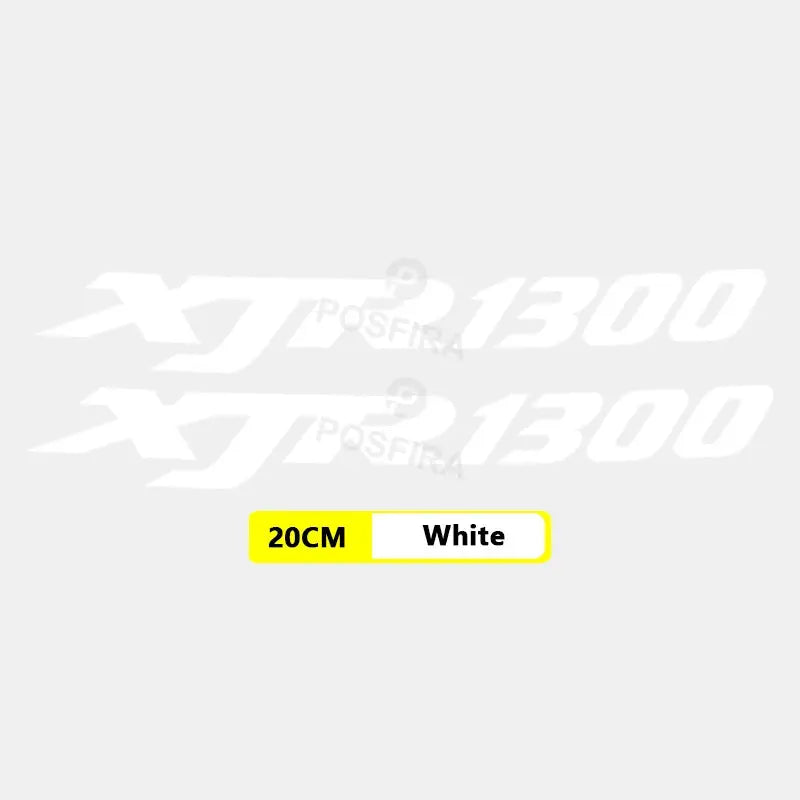
Yamaha XJR1300 Sticker Side Cover Logo Set
The Yamaha XJR1300 sticker set, designed for one of the most iconic "muscle bike" models in the motorcycle world, known for its massive air-cooled engine block, is ideal for those who want to preserve its classic look. Over time, the lettering on the side covers can fade or wear off, detracting from the motorcycle's imposing appearance. Produced with Sticker Master quality, these restoration stickers help your motorcycle regain its original identity. The material, resistant to road conditions, engine heat, rain, and sun, will not peel off for many years.
The Red, Blue, White, Silver, and Black color options shown in the image are perfectly in line with the classic color schemes of the XJR series. Application is quite simple thanks to the transfer tape; you can easily align the Yamaha XJR1300 Sticker set and apply it to the side panels without leaving air bubbles. Compatible with models from 2000 to 2018, this logo aesthetically accentuates the muscular and retro spirit of your motorcycle. Give your legendary machine the care it deserves and capture the elegance in the details.
Sticker Master is not a commercially affiliated brand with Yamaha Motor Company. This product is a decorative sticker featuring Yamaha and XJR1300 logos and is intended solely for enthusiast personalization and restoration purposes.
Product Details
Product Name: Yamaha XJR1300 Side Cover Sticker Set
Brand: Sticker Master
Material: Premium Vinyl (Waterproof and Outdoor Resistant)
Color Options: Red, Blue, White, Silver, Black
Size: Compatible dimensions with the original side cover.
Application Area: Right and left side panels
Compatibility: Yamaha XJR 1300 (models from 2000-2018)
Durability: Resistant to washing, UV rays, and heat.
Origin: Sticker Master - Türkiye
SKU: SM-MTR-XJR-1300-025
Barcode: 8681112228800
Why should you choose this sticker?
It gives your motorcycle a classic and original look. Easy to apply and leaves no residue when removed. Renew your motorcycle with this high-quality design in various color options , backed by Sticker Master's guarantee. It adds a retro muscle bike vibe to your style.
🏷️ Tags:
Yamaha XJR1300 stickers, XJR 1300 accessories, muscle bike stickers, naked motorcycle stickers, side panel lettering, sticker master, motorcycle restoration, XJR logo, Yamaha sticker set.

Frequently Asked Questions
Frequently Asked Questions
Will the sticker remove the paint?
With quality vinyl and proper application, the sticker will not damage the paint. Simply clean the surface before application and peel off slowly from the edges.
How long will the sticker last outdoors?
Outdoor car and motorcycle stickers are made from vinyl material that is resistant to UV rays and weather conditions. With proper use, they retain their vibrancy for a long time.
Will the sticker leave any residue after removal?
It leaves no permanent marks on most surfaces. If slight sticky residue forms, you can easily clean it off with a suitable cleaning product.
What surfaces can the stickers be applied to?
It can generally be easily applied to flat, clean, and dry surfaces (metal, glass, plastic, lacquer, some smooth wall paints, etc.).
Sticker Master Application Guide
Sticker Master Application Guide
🎯 Sticker Master Application Guide – How to Apply Vinyl Stickers?
Vinyl Installation Training
If you're hesitant about applying your vinyl or unsure how to do it, this guide will walk you through it step-by-step.
This tutorial, created by Sticker Master, is designed to help you easily learn how to apply vinyl stickers in a clear, understandable way that anyone can follow.
Now you have no excuse not to change the decor of your home, office, or car!
This guide is designed to answer all your questions that may arise during the application process.
However, if you need support, you can contact info@stickermaster.com.tr
You can contact us at this address.
Remember, applying vinyl is a fun process — enjoy it!
Required Materials
A spatula or similar object (credit card, ID, etc.)
A clean, lint-free cloth.
A flat, dry, and smooth surface.
Delivery and Packaging
Your order will be shipped in a durable cardboard tube or bubble wrap envelope to protect its contents.
If you purchased a spatula, it will also be included in your package.
A sample square sticker will also be sent so you can try it out before applying it.
If you are not going to apply your sticker immediately, it is recommended to remove it from the tube and store it flat.
This preserves the adhesive's structure and provides better results during application.
Pre-Application Preparation
Ensure the surface where the vinyl will be applied is dry, clean, and smooth.
If there is dust, moisture, stains, or greasy residue, the surface must be cleaned.
Do not apply to newly painted surfaces.
Wait until the paint is completely dry (approximately 4–6 weeks).
Surfaces like plastic paint are the ideal substrate for application.
Do not use surface cleaners such as glass cleaner — they will prevent the adhesive from sticking.
Use water or isopropyl alcohol instead.
Sticker Master vinyl products deliver excellent results on smooth surfaces.
If the surface is unsuitable, you can contact us for a solution.
How to Apply Vinyl?
1. Open the package
Carefully open the cardboard tube and remove the vinyl and transfer paper.
Check the dimensions of the vinyl — large-sized products may contain multiple panels.
2. Prepare the transfer paper.
Using a spatula, press down over the entire surface of the transfer paper on the vinyl.
This ensures that small details adhere properly.
3. Measure and Position the Surface
Measure the wall or application area, and position the vinyl.
Fold the protective paper at the top by about 5 cm.
4. Start the Application
Secure the top part, then slowly pull the protective paper down.
Using a spatula, press down from the center outwards at each step.
5. Final Checks
Once all the vinyl has adhered, go over the transfer paper again with the spatula.
This ensures that no air bubbles remain on the surface.
Finally, slowly remove the transfer paper by pulling it off the surface at a 180° angle.
Application to Glass Surfaces
Wet application method is recommended for glass surfaces.
Required Materials:
Spray bottle
200 ml water
2–3 drops of dish soap (e.g., Fairy)
Clean cloth and spatula
Application Steps:
Spray the water-soap mixture from the spray bottle onto the glass.
Clean and dry the surface.
Spray the same mixture again.
Place the sticker and use the spatula to push out excess liquid.
Leave to dry for 12–24 hours.
If there is transfer paper, remove it after this time.
Additional Information
Since vinyl is shipped in rolls, this can lead to some creases in the transfer paper.
This is completely normal and does not affect the quality of the vinyl in any way.
Simply wipe over the surface with a spatula before application.
Guaranteed by Sticker Master.
At Sticker Master, we guarantee quality, ease of application, and long-lasting adhesive on every product.
Applying vinyl is not only decorative — it's also a fun way to express your personal style.
Stick to your style!
Delivery Information
Delivery Information
Standard delivery within 2 days.
Fast delivery is available to your address within 48 hours.
These shipping terms are indicative and not binding. Final delivery times and costs will be shown once the final delivery address and shipping agent service are selected.
🎉 STICKER MODELLERİNDE 4 AL 3 ÖDE!
Favori sticker’larını sepete ekle, her 4 üründe 1 tanesi otomatik olarak ücretsiz! 👇
Alışverişe BaşlaAradığınız sticker'ı bulamıyor musunuz?
Kendinize özel bir sticker tasarlayın, kişiselleştirme aracımızla zevkinize ve ihtiyaçlarınıza göre uyarlayın ve alanınızı benzersiz hale getirin!
Kişiselleştir! — Tarzını Yapıştır ! —